Blutree Orthopedic Implants
Emergency care leaves little room for guesswork. A damaged femur, unstable wrist, or open fracture may require an implant before a full inventory review is possible. Yet speed should never replace clinical judgment. The practical question is not simply which device is available, but How to select orthopedic implants for emergency medical supplies while protecting patient safety, surgical flexibility, and long-term function.
AO founder Maurice E. Müller stated, “The goal of fracture treatment is to restore function.” That principle remains useful in emergency procurement. Hospitals should assess implant strength, anatomical coverage, sterile packaging, size availability, and compatibility with familiar instruments. Surgeons also need clear evidence on materials, indications, contraindications, and revision options. A tray that looks complete may still fail when the correct screw length is missing. Small details matter.
Keep the system simple.
Experienced trauma teams often favor modular systems with broad sizing ranges and predictable handling. They review supplier reliability, lot tracking, shelf life, training support, and transparent quality documentation. These checks support E-E-A-T because decisions rely on clinical experience, technical knowledge, credible manufacturers, and verifiable records.
There is no perfect emergency set. That is worth admitting. A hospital may overstock rarely used sizes or overlook regional injury patterns. Regular case reviews can expose those weaknesses. The strongest selection process stays practical, evidence-informed, and open to correction. When minutes matter, dependable preparation gives clinicians more attention for the patient, not the packaging.
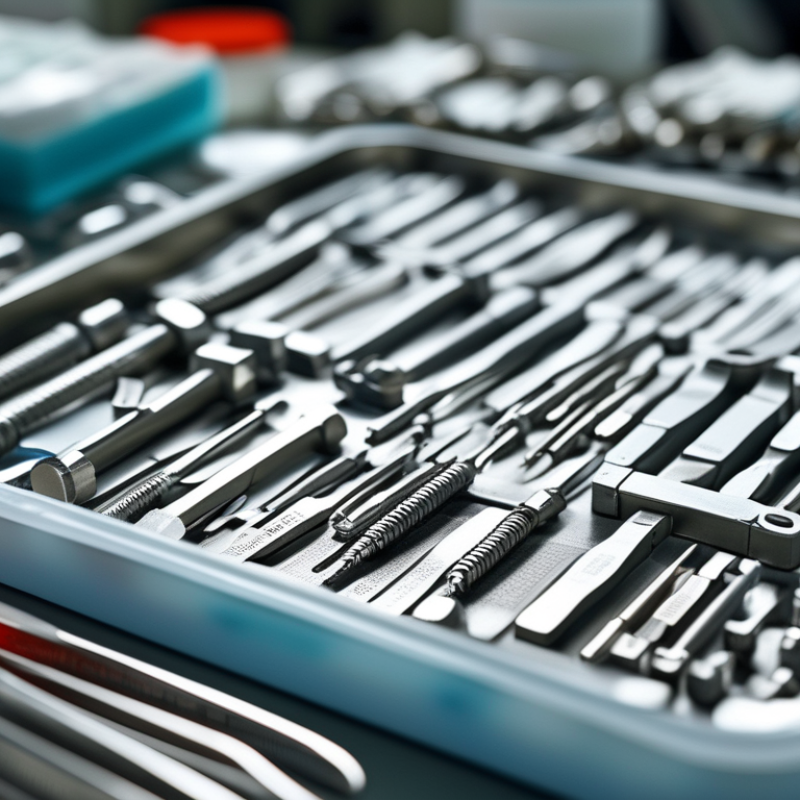
Emergency orthopedic implant selection begins with the patient, not the product catalog. Assess the injury pattern, bone quality, soft-tissue damage, contamination risk, and expected surgical position. Review available imaging carefully, especially when fractures extend into a joint. Time is tissue. However, speed should not replace verification.
Tip: Prepare several implant sizes before incision, but confirm compatibility with the instruments and fixation method. Emergency systems should support common fracture patterns, clear labeling, sterile packaging, and dependable inventory. Surgeons and operating-room staff must understand insertion steps, backup options, and potential complications. A familiar design can reduce avoidable delays, yet familiarity may also create blind spots.
Tip: Check material suitability, implant strength, and the patient’s allergies or medical history. Follow current clinical guidance, facility protocols, and applicable regulatory requirements. Document the selected size, lot information, imaging findings, and intraoperative decisions. This record supports follow-up care and future revision planning. I would not rely on a single checklist; urgent cases change quickly, and a missed detail can matter. Still, an unstructured choice is worse. Clear communication between the trauma team, radiology staff, sterilization unit, and supplier helps confirm that the implant is ready, appropriate, and traceable.
In an orthopedic emergency, implant selection begins with the patient, not the instrument tray. Vital signs, blood loss, skin temperature, and limb sensation require immediate attention. A cold foot or absent pulse changes the treatment pathway. Do not overlook pain that seems disproportionate to the visible injury. It may indicate vascular damage or compartment syndrome. I have learned that hurried examinations often miss small wounds hidden beneath clothing. Photographing the limb, documenting neurological findings, and repeating vascular checks improve reliability.
Injury complexity determines the implant’s mechanical demands. Review radiographs from several angles, then use advanced imaging when fracture lines remain unclear. Assess bone quality, joint involvement, soft-tissue damage, contamination, and the patient’s ability to follow rehabilitation instructions. A fragile metaphyseal fracture may need different support from a simple shaft fracture. Open injuries require careful coordination with wound management and infection-control teams. Patient age, kidney disease, diabetes, smoking, and previous operations can alter healing expectations. Keep it practical. Discuss implant strength, fixation length, future procedures, and realistic recovery with the patient whenever possible. In unstable patients, temporary stabilization may be safer than definitive fixation. My own early judgments have not always been correct. New imaging, swelling, or examination changes can reveal a more difficult injury. Reassessment is not hesitation; it is responsible decision-making.
Assessing patient condition and injury complexity before choosing definitive or temporary fixation.
The chart presents an educational clinical-priority score from 1 to 5. Hemodynamic instability and severe soft-tissue damage generally favor rapid, damage-control stabilization, while contamination, bone loss, and fracture complexity increase the need for carefully planned fixation and staged reconstruction. Final implant selection should follow the patient’s examination, imaging, vascular status, contamination level, and multidisciplinary trauma assessment.
In emergency orthopedics, implant selection begins with the injury, not the catalog. Match material to tissue, load, and contamination risk. Titanium alloys offer strength with lower stiffness than stainless steel, which may reduce stress shielding. Cobalt-chromium remains useful where high wear resistance matters. Ceramic components can lower wear, but they demand careful handling and accurate positioning. Polymers may reduce weight, yet their long-term behavior needs review.
Design must fit the patient’s anatomy and the surgeon’s access. Locking plates can support fragile bone, while intramedullary nails often preserve soft-tissue blood supply. Choose the smallest implant that restores stability. Bigger is not automatically safer. In a crowded emergency tray, modular systems can save time, but compatibility errors remain possible. Confirm diameter, hole pattern, screw thread, and instrumentation before incision.
Size selection should use imaging, fracture geometry, and intraoperative trialing. Measure twice. Cut once does not apply here. The World Health Organization’s Global Patient Safety Action Plan notes that about one in ten patients experiences harm during healthcare, reinforcing the need for reliable checks. The International Organization for Standardization also requires implant materials and mechanical performance to meet defined standards, including ISO 5832 for metallic surgical implants. Still, standards cannot replace clinical judgment. A 2023 report from the National Joint Registry highlights how implant performance depends on patient factors, procedure details, and follow-up data. Emergency decisions are imperfect. Document the reasoning, limitations, and backup plan.
| Emergency Scenario | Primary Implant Objective | Common Material Options | Design and Fixation Considerations | Sizing Guidance | Key Selection Checks |
|---|---|---|---|---|---|
| Unstable long-bone fracture | Restore alignment, length, rotation, and load-bearing stability. | Titanium alloy or stainless steel plates, intramedullary nails, and locking screws. | Use a design suited to the fracture pattern and soft-tissue condition. Locking fixation can support reduced-bone-contact constructs when direct compression is undesirable. | Select implant length and diameter from imaging and, when available, the opposite limb. Confirm adequate fixation both proximal and distal to the fracture. | Check canal diameter, fracture location, screw trajectory, instrument availability, and compatibility of all components. |
| Periarticular fracture | Achieve joint-surface reduction while maintaining angular and rotational stability. | Titanium alloy or stainless steel anatomically contoured plates; ceramic or polymer components are generally relevant only in selected arthroplasty situations. | Variable-angle locking holes may help direct screws around the joint. Low-profile contours can reduce soft-tissue irritation, but must not compromise strength. | Match plate geometry to the affected bone and side. Choose screw lengths that provide purchase without entering the joint. | Review multiple radiographic views or CT when needed; verify subchondral support, joint clearance, and soft-tissue envelope. |
| Open fracture with contamination risk | Provide temporary or definitive stability while minimizing additional tissue injury and infection risk. | Stainless steel or titanium external-fixation components; definitive internal materials depend on debridement, soft-tissue coverage, and clinical assessment. | Modular external frames allow rapid adjustment and access to wounds. Keep pins and bars positioned to avoid planned flap or graft sites. | Use pin diameter and frame configuration appropriate to bone size and expected loads; avoid placing pins in compromised or contaminated tissue when possible. | Coordinate fixation with irrigation, debridement, antibiotics, vascular evaluation, and soft-tissue planning. |
| Pelvic or acetabular instability | Control displacement and protect pelvic-ring or acetabular alignment. | Titanium alloy or stainless steel plates, screws, and temporary external-fixation systems. | Choose designs that follow the selected pelvic corridor and provide stable fixation without injuring neurovascular structures. | Sizing should be based on thin-slice CT and three-dimensional anatomy rather than plain radiographs alone. | Confirm screw path, safe zones, implant reach, patient positioning requirements, and availability of image guidance. |
| Vertebral fracture requiring stabilization | Restore spinal stability and maintain alignment while protecting neural structures. | Titanium alloy pedicle screws, rods, plates, and interbody components selected according to the procedure. | Use construct designs appropriate to the spinal level, fracture morphology, bone quality, and need for decompression or fusion. | Determine screw diameter, length, rod contour, and interbody dimensions from CT, MRI, and intraoperative assessment. | Assess canal compromise, pedicle dimensions, neurologic status, osteoporosis, and implant compatibility with imaging systems. |
| Traumatic joint destruction | Restore function when reconstruction is not feasible and provide a stable articulating surface. | Common combinations include cobalt-chromium or ceramic bearing surfaces with titanium alloy stems or shells; ultra-high-molecular-weight polyethylene may be used as a liner or bearing component. | Select cemented or cementless fixation according to bone quality, anatomy, urgency, and the intended arthroplasty procedure. | Match component size to templating, native anatomy, soft-tissue tension, and available trial components; avoid overstuffing or excessive laxity. | Evaluate infection risk, bone loss, neurovascular status, bearing compatibility, and the need for backup sizes. |
| Osteoporotic or fragile bone | Increase fixation reliability while reducing the risk of cutout, pullout, and secondary displacement. | Titanium alloy or stainless steel fixation systems; cement augmentation may be considered only when clinically appropriate and supported by the device system. | Load-sharing nails, locking plates, multiple fixation points, and longer constructs may improve stability depending on anatomy and fracture pattern. | Use imaging to estimate bone dimensions and choose a size that maximizes purchase without creating cortical damage or joint penetration. | Review bone density, fracture comminution, screw purchase, augmentation risks, and postoperative weight-bearing requirements. |
| Pediatric fracture or physeal-region injury | Stabilize the injury while preserving growth plates and minimizing damage to developing bone. | Sterile stainless steel or titanium alloy implants selected for pediatric anatomy and the planned removal or retention strategy. | Use the least invasive design that provides adequate stability; avoid crossing open physes unless specifically indicated. | Choose small-diameter screws, short plates, or flexible implants according to age, bone size, fracture location, and growth potential. | Confirm implant dimensions, growth-plate location, expected remodeling, removal requirements, and pediatric instrument availability. |
| Temporary damage-control stabilization | Rapidly restore limb length and alignment in a physiologically unstable or severely injured patient. | Modular stainless steel or titanium external-fixation components. | Simple, adjustable frames facilitate resuscitation, wound care, and later conversion when the patient is stable. | Prioritize rapid application and adequate working clearance; select pin and bar dimensions for the bone segment and expected temporary load. | Check operating-room time, radiolucency needs, pin-site access, conversion plan, and availability of sterile backup components. |
| Any urgent implant selection | Deliver safe, mechanically appropriate fixation using a system that can be accurately implanted under emergency conditions. | Use implant-grade materials with documented biocompatibility, sterilization status, and regulatory authorization for the intended use. | Favor familiar, interoperable designs with dependable instrumentation and clear surgical technique instructions. | Prepare a range of sizes, including at least one smaller and one larger contingency option when anatomy is uncertain. | Verify patient identity, laterality, imaging, allergies, implant traceability, sterility, expiry date, instruments, and the complete backup plan. |
Note: Final implant selection must be made by a qualified orthopedic or trauma team after evaluating the patient, imaging, fracture pattern, bone quality, soft-tissue condition, and applicable instructions for use.
In emergency orthopedic care, sterility must be verified before implant selection. Inspect the package seal, expiration date, lot number, and sterilization indicator. Do not use packaging that is wet, torn, or unclear. Record the implant details for traceability. A clean-looking package is not proof of sterility. Follow hospital protocols and applicable medical-device standards.
Tips: Confirm compatibility with the patient’s anatomy, imaging results, and planned fixation method. Check whether the required screws, plates, instruments, and sizing options are available together. A compatible implant is useless if its delivery system is missing. Review allergies, previous hardware, bone quality, and imaging restrictions when time permits. Ask the surgical team to verify fit before opening sterile packaging.
Availability also includes trained staff, backup sizes, and reliable inventory records. In urgent cases, storage location matters. A device listed in a database may still be unavailable in the operating room. Check the seal again at the bedside. This small step can prevent avoidable delays. Checklists improve reliability, but they are not flawless. Human judgment remains necessary when anatomy, inventory, or imaging is uncertain. Document deviations and reassess the plan with the qualified surgical team.
In emergency orthopedic care, implant safety starts before opening the package. Confirm sterility, expiration dates, packaging integrity, and compatibility with available instruments. Review the patient’s allergies, bone quality, infection risk, and relevant medical history. A rushed decision can overlook one detail. It happens.
Performance depends on matching the implant to the injury, anatomy, and expected loading conditions. Imaging should guide size, alignment, and fixation strategy. The surgical team should check whether the implant offers stable fixation without unnecessary tissue damage. Instruments must function smoothly under pressure. If a component feels unsuitable, pause and reassess rather than forcing the plan. Laboratory data and established clinical evidence can support selection, but they cannot replace professional judgment.
Follow-up needs should influence the emergency choice. Select systems that allow clear postoperative imaging and practical monitoring. Document the implant type, size, placement, and any intraoperative concerns. Give the patient understandable instructions about wound changes, fever, swelling, pain, and restricted movement. Arrange follow-up before discharge whenever possible. Coordination between emergency staff, surgeons, radiologists, and rehabilitation professionals improves continuity. No checklist is perfect, especially during a crowded night shift. Reviewing complications and missed warning signs can improve future decisions.
Match the material to tissue, loading, and contamination risk. Titanium alloys combine strength with relatively low stiffness. This may reduce stress shielding. Cobalt-based alloys suit areas requiring high wear resistance. Ceramic parts can reduce wear but need careful handling. Polymer components weigh less, though long-term behavior requires review.
Not automatically. Choose the smallest implant that restores stability. Locking plates may support fragile bone. Intramedullary nails can help preserve soft-tissue blood supply. Fit must follow anatomy, fracture shape, and surgical access.
Confirm diameter, hole pattern, screw thread, and available instruments. Modular systems may save time during a crowded emergency. Compatibility errors remain possible. Check before incision.
Use imaging, fracture geometry, and intraoperative trialing. Measure twice. Do not rely on catalog size alone. Confirm alignment and fixation before final placement. The choice may still be imperfect.
Check sterility, expiration date, packaging integrity, and instrument compatibility. Review allergies, bone quality, infection risk, and medical history. A rushed decision can miss one detail. It happens.
Pause and reassess the plan. Do not force a component into position. Review imaging, anatomy, loading needs, and available alternatives. Professional judgment remains essential, even with laboratory evidence.
Select systems that allow clear postoperative imaging and practical monitoring. Record the implant type, size, placement, and intraoperative concerns. Arrange follow-up before discharge whenever possible. Small documentation gaps can become important later.
Explain wound changes, fever, swelling, pain, and restricted movement. Use clear language and concrete examples. Tell the patient when to seek review. Coordination among clinical and rehabilitation teams improves continuity. No checklist catches everything. Reviewing missed warning signs can improve future care.
Selecting orthopedic implants for emergency medical supplies requires a structured approach that prioritizes patient safety, surgical practicality, and long-term recovery. How to select orthopedic implants for emergency medical supplies begins with understanding the injury, the patient’s age, bone quality, medical history, and the urgency of treatment. Fracture location, severity, soft-tissue damage, and possible complications should guide the choice of implant type, design, and size.
Materials and implant configurations must be appropriate for the patient and compatible with the surgical technique and available instruments. Medical teams should confirm sterility, packaging integrity, expiration dates, and compatibility with existing equipment before surgery. Availability in suitable sizes is also essential, especially when unexpected anatomical differences arise. Finally, clinicians should evaluate mechanical stability, biocompatibility, ease of placement, and the patient’s follow-up needs. Clear documentation, postoperative monitoring, and timely reassessment help identify complications early and support safe healing.
